It’s that time again.
Craft dorkin’ time, baby!
We’re nearing the holiday gift rush and each of these were selected because they all can serve as awesome presents.
And what says “holiday madness” more than an inordinate amount of glitter?
The answer: NOTHING.
Make them as-is or make them your own. All crafts are not terribly time consuming, making it easy to knock out any or all in an afternoons time. They’re each wildly unique and it’s guaranteed that the giftee will be floored.
 |
| Get your glue. Get your glitter. LET’S DO THIS. |
So, take heed, and get craftin’!
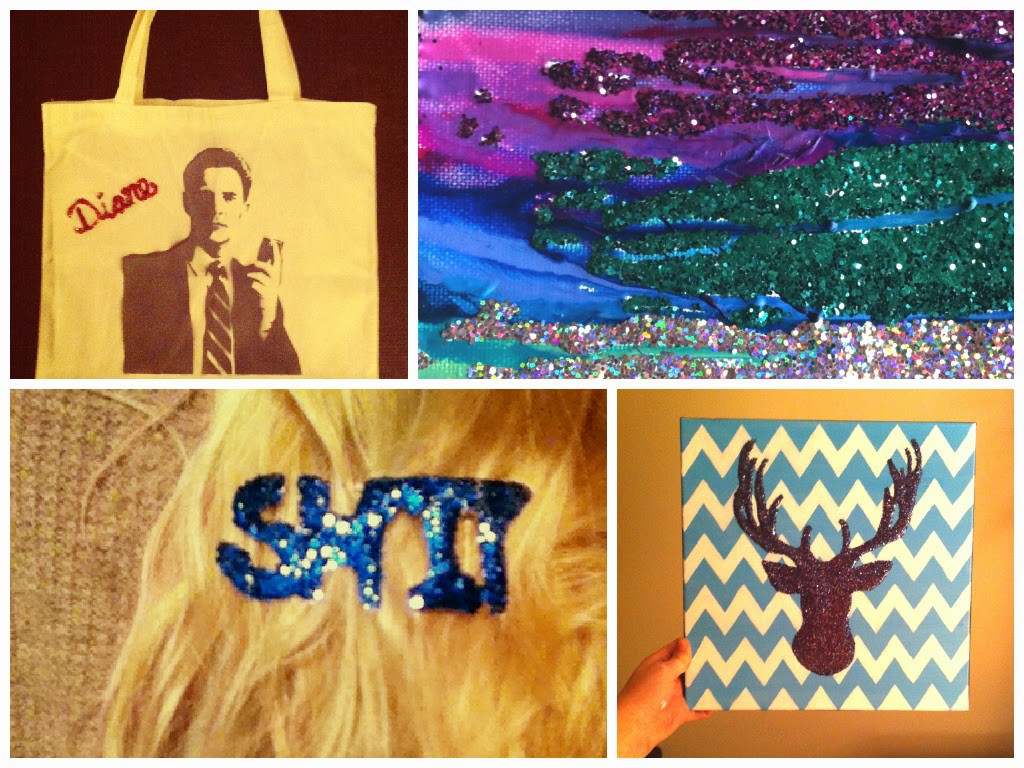
LITERAL GLITTERY SHIT BARRETTE
Let’s start with the simplest.
Do you know the English language? Do swear words appeal to you?
Well, then, I suppose the glittery shit barrette is for you. The best part is it’s insanely easy and you can choose for it to say something sweet or something offensively vile.
What You’ll Need:
- Elmers Glue
- Glitter
- Metal Barrette
- Wax Paper
- Hot Glue Gun
Directions:
- On a wax sheet of paper, take your Elmers glue and write out your message. Time is of the essence, so have your choice of glitter ready.
- Dump glitter on there. Drown it. Murder it with glitter. Then let the excess slide off. Tap off any extra.
- Wait until the glue has dried.
- Peel off the glue and trim any accidents.
- Glue your glittery word to the barrette.
- Let dry and prepare for a stream of compliments.
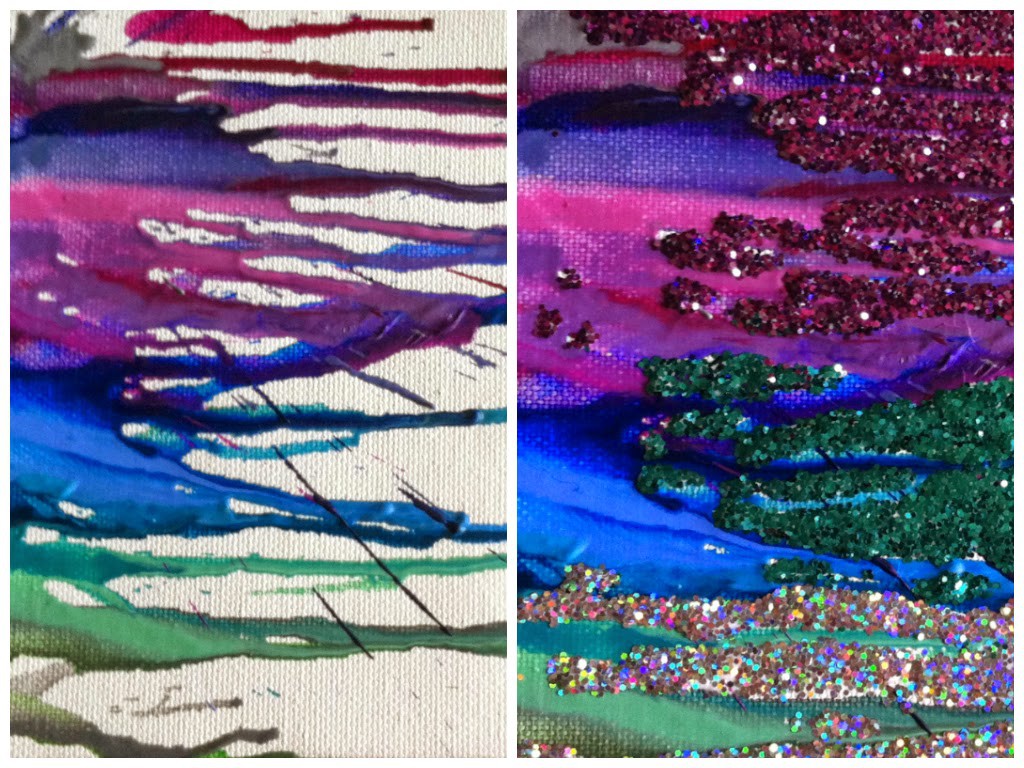
SPARKLY CRAYON-SPLOSION ABSTRACT
I’ve been seeing a lot of crayon art on the craft sites recently, but they’re usually kind of sappy and lame. I wanted to make something that looks rad that doesn’t resemble a weak-ass floral bouquet.
I had an absolute blast making this. It was so fun to watch the color melt and blend with the other hues. It’s a great companion piece if you want to add some color to your room without making your area too busy.
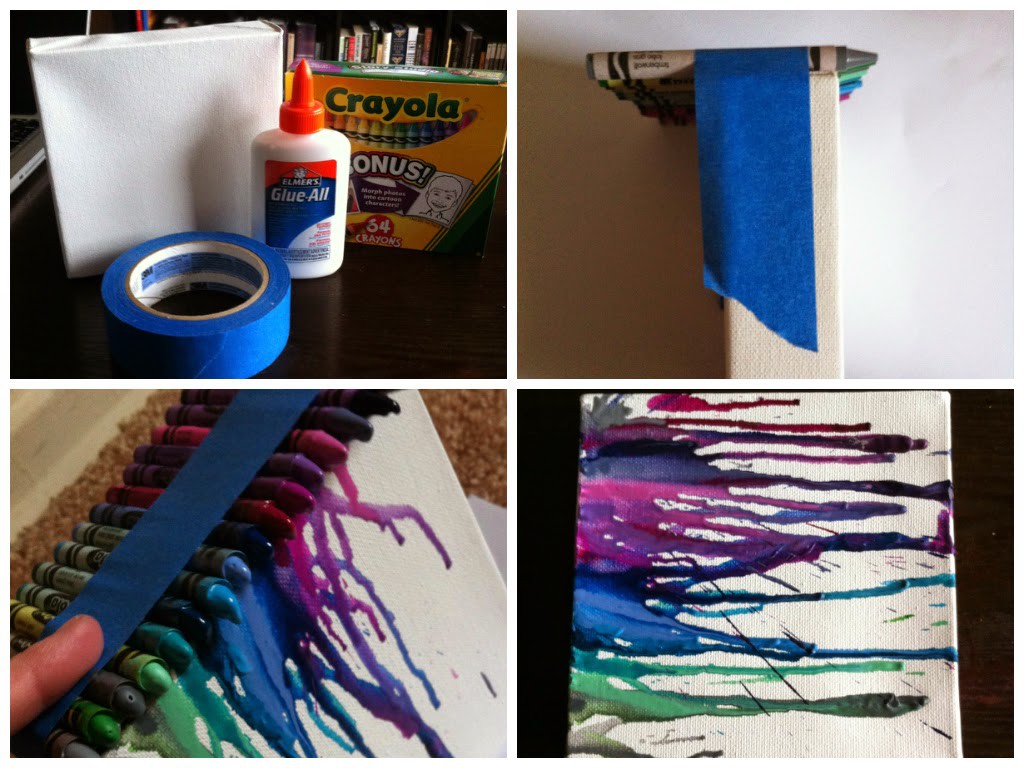
You Will Need:
- Crayons
- Canvas
- Glitter
- Elmers Glue
- Blow Drier
- Painters Tape
Directions:
- Select your crayons for the piece. Using the painters tape, attach the crayons to the top of the canvas with only the crayon tips hanging over the front of it.
- Turn the blow dryer on high heat, but low fan speed. Otherwise you’ll blast crayon juice on everything.
- Work your way from either left to right or right to left. This way, you’ll get an even application of wax along the canvas.
- Allow wax to dry. If you choose not to add glitter, this is also an awesome final result.
- Fill in the negative spaces (AKA white area) with elmers glue.
- Sprinkle on glitter. Choose as many colors as you please.
- Tap off excess and lay it flat to let it dry.
- Good job, you made abstract art. Eat your heart out, Kandinsky.
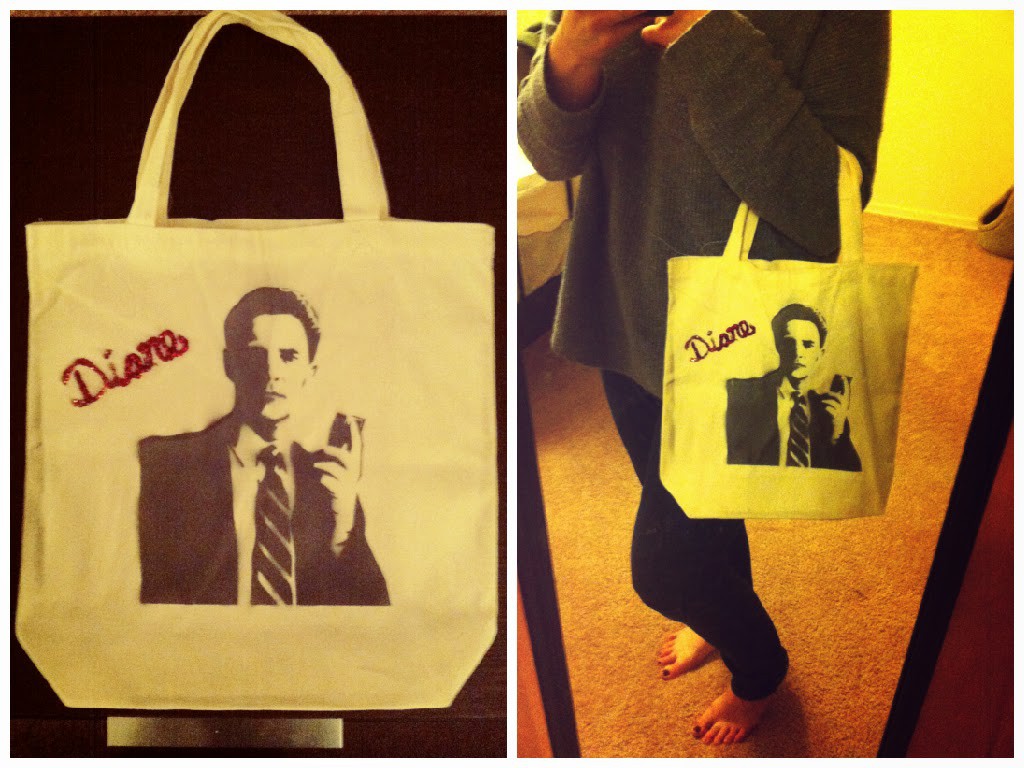
“DIANE” TWIN PEAKS TOTE
Okay, so I’ve got a Twin Peaks problem. What of it?
This makes a great gift or a stellar…. not gift.
I’m going to be making a couple because I know I can’t part with it!
I used spray paint because this stencil was made previously for spray paint applications and I didn’t want to gum it up. However, I do recommend that you use fabric paint with a sponge brush for application instead. This way of applying paint will last longer and pop more. Regardless of paint, you won’t want to throw this in the washer. Definitely spot clean only.
So, make sure you don’t spill any of your damn good coffee on it.
You Will Need:
- Canvas Tote
- Hot Glue Gun
- Glitter
- Fabric Paint
- Sponge Brush
- Stencil
- Painters Tape
Directions:
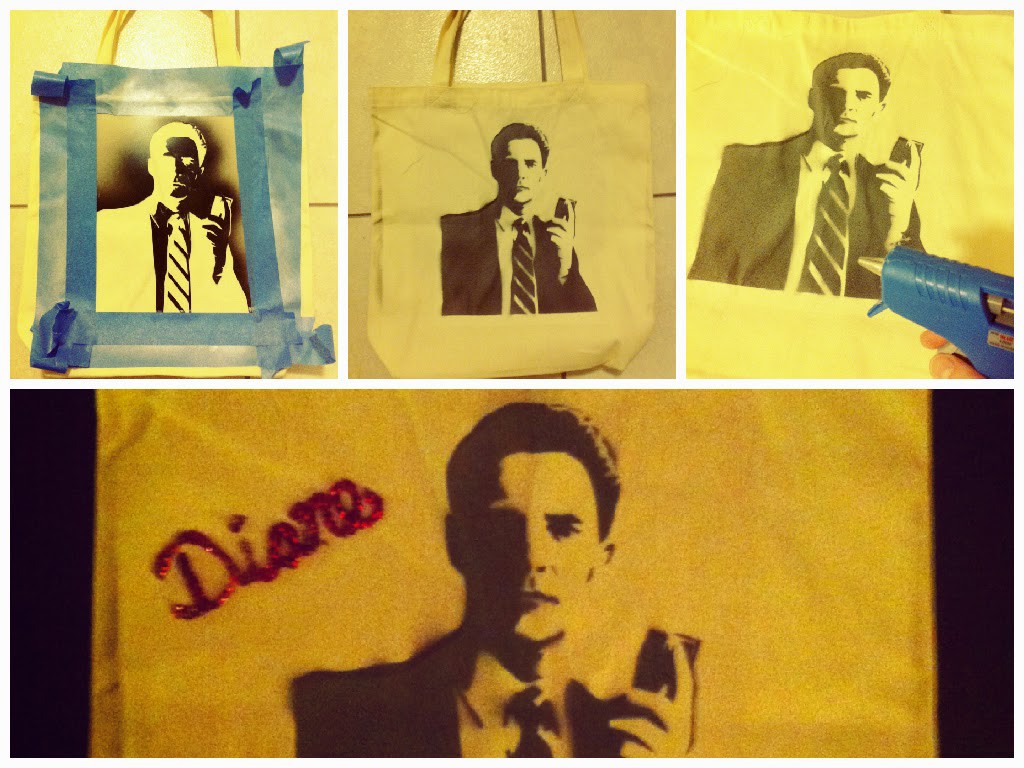
- Either create or buy stencil. This could also be cute with a houndstooth pattern or chevron, similarly. I made my own stencil by printing off a pic and tracing on a stencil blank over it. I used an x-acto knife to cut out all the dark spaces, creating a “negative” of sorts.
- Take your painters tape and tape the hell out of your stencil onto the bag. If you’re spray painting you’re going to need to tape to the ends of the bags to keep the paint from wandering onto other parts of your tote.
- Apply paint slowly making sure that no part of the stencil is lifted. If the stencil isn’t exactly in place, it can make your image muddy. Allow to dry.
- Remove stencil and tape.
- Heat up your hot glue gun and slowly spell out “Diane” one letter at a time. I added glitter to each letter individually. Tap off excess glitter after you complete each letter.
- Let hot glue dry. Congrats, you now have a totally rad bag you can’t find anywhere else!
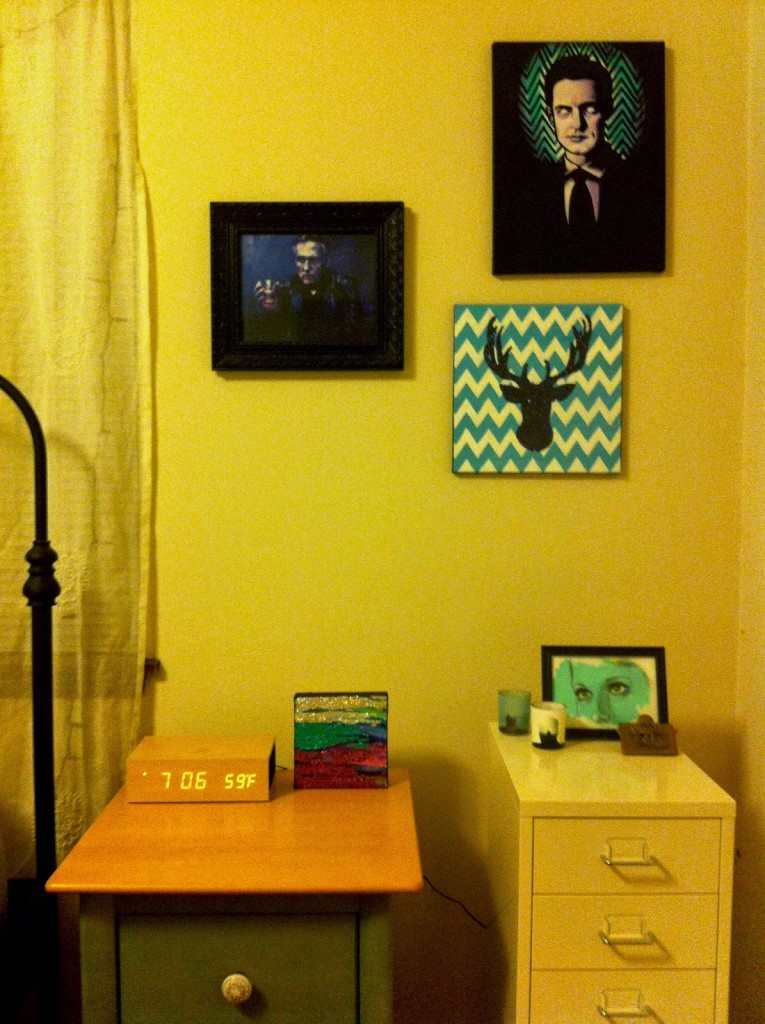
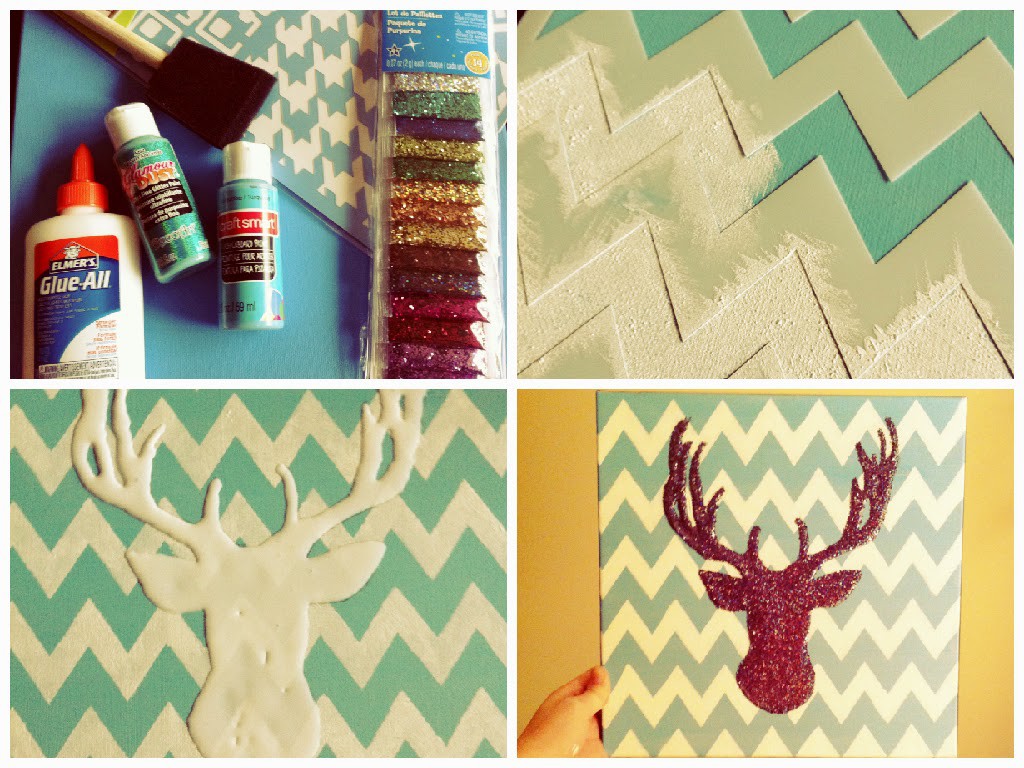
Oh, Deer! Chevron Wall Art
I’ve seen variations on the glitter deer (or rather, buck) all over the place lately. I wanted to make my own to add to my bedroom. I used the free template available from the folks at manmadediy.com and couldn’t be more in love with it.
Much thanks to them for the assist!
What You Need:
- Elmers Glue
- Patterned Stencil
- Canvas
- Paints
- Sponge Brush
- Deer Bust Template
- Black Glitter
Directions:
- Paint your canvas whatever base color you choose. I decided on a teal for mine because it looks lovely in my lair.
- Lay down your patterned stencil and apply paint with the sponge brush slowly. Make sure you rush or else you’ll be really bummed when you lift the stencil. If you do goof, keep your base color on hand to fix any accidents. Which, trust me, even I had plenty of those.
- Once completely dry, cut out your deer template and lay it dead center. Take a pencil and trace around the deer. If you don’t wait for the paint to dry the glitter will stick to it and you’ll end up with a… well, a mess.
- Fill in the area you’ve just traced with elmers glue and distribute glitter evenly.
- Let dry flat and, boom, you’ve just made art, dammit!





























You must be logged in to post a comment Login